
Oh my gosh, if you haven’t tried baked Italian grinder sandwiches yet, you’re missing out on one of life’s greatest simple pleasures! Picture this: crusty bread stuffed with layers of salty ham, spicy pepperoni, melty provolone, and tangy banana peppers, all baked until the cheese is bubbling and the edges get that perfect golden crunch. I swear, the first time I made these for friends, they practically licked the baking sheet clean. What I love most is how they transform basic deli ingredients into something magical with just 20 minutes in the oven – the ultimate crowd-pleaser that always disappears faster than I can make them!
Why You’ll Love This Baked Italian Grinder Sandwich Recipe
Trust me, once you try these baked Italian grinder sandwiches, you’ll understand why they’ve become my go-to recipe for everything from game day to lazy weeknights. Here’s what makes them so special:
- Effortless deliciousness: Just layer, bake, and boom – you’ve got restaurant-quality sandwiches with barely any work
- Crowd-pleasing magic: The combination of melty cheese, savory meats, and that crispy bread makes everyone come back for seconds
- Total customization: Swap in your favorite deli meats or cheeses – I sometimes use turkey or spicy capicola when I’m feeling fancy
- That perfect cheese pull: Baking transforms the provolone into gooey, stretchy perfection you just can’t get from cold sandwiches
- Bold flavors: Between the garlicky mayo spread, zesty banana peppers, and rich marinara, every bite packs serious flavor
Seriously, these sandwiches are like a warm hug from your favorite Italian deli – but way cheaper and you don’t even have to put on pants to enjoy them!
Ingredients for Baked Italian Grinder Sandwiches
Okay, let’s talk ingredients – the building blocks of flavor that make these sandwiches so darn addictive! I’ve learned through trial and error that quality matters here, but don’t stress about finding fancy stuff. Your regular grocery store deli counter has everything you need.
For the bread (the all-important foundation!):
- 4 hoagie rolls or sub rolls (look for ones with a sturdy crust but soft interior)
- 1 tbsp melted butter or olive oil (for that golden, crispy top)
The glorious meats (go for the good stuff!):
- 6 oz deli ham, sliced (I like Black Forest or honey baked)
- 6 oz salami, sliced (Genoa is my favorite for that garlicky punch)
- 3–4 oz pepperoni slices (get the good thick-cut ones if you can)
Cheese please (because melty = happiness):
- 8 slices provolone cheese (the star that gets all ooey-gooey)
- 2 tbsp grated Parmesan (for that extra savory kick in the mayo spread)
Flavor boosters (the secret weapons!):
- 1 cup marinara sauce (plus more for dipping – use your favorite jarred or homemade)
- 1/2 cup banana pepper rings, drained (or dill pickle slices if you prefer)
- 1/2 cup fresh basil leaves (or shredded romaine for crunch)
The magical mayo spread (don’t skip this!):
- 3 tbsp mayonnaise (trust me, it makes everything better)
- 1 tsp garlic powder (or 1 fresh minced clove if you’re feeling fancy)
- 1 tsp Italian seasoning (that classic herb blend we all love)
- Optional: crushed red pepper flakes if you like some heat
See? Nothing too crazy – just good, honest ingredients that come together to create pure sandwich magic. The key is getting everything prepped and ready before assembly – makes the whole process way easier!
How to Make Baked Italian Grinder Sandwiches
Alright, let’s get to the fun part – assembling these flavor-packed beauties! I promise it’s easier than you think, but there are a few key steps that make all the difference between good and “Oh-my-gosh-I-need-another-bite” amazing. Here’s how I do it:
Step 1: Prep the Rolls
First things first – preheat that oven to 375°F and line your baking sheet with foil (trust me, you’ll thank me during cleanup). Now grab those hoagie rolls and slice them lengthwise, but don’t cut all the way through – we want a sturdy hinge to hold all our delicious fillings. Pop them in the oven for just 3-4 minutes to lightly toast the insides. This little trick prevents soggy bread later when we add all those juicy toppings!
Step 2: Layer the Meats and Cheeses
While the rolls are toasting, mix up that magical mayo spread: stir together mayo, Parmesan, garlic powder and Italian seasoning. Spread this inside each roll – it’s the flavor glue that holds everything together! Now the layering begins (this is my favorite part):
Start with a spoonful of marinara on the bottom (not too much or it’ll get soggy), then provolone → ham → salami → pepperoni → provolone again. Top with banana peppers and fresh basil leaves. That double layer of provolone? Pure genius – it melts into every nook and cranny for maximum cheesiness in every bite!
Step 3: Bake to Perfection
Now for the magic! Brush the tops with melted butter (or olive oil) and sprinkle with a pinch more Italian seasoning. Bake for 10-12 minutes until the cheese is bubbly and the edges are golden. If you want extra crispiness (and who doesn’t?), broil for 1-2 minutes but WATCH CLOSELY – those babies can go from perfect to burnt in seconds! Let them cool just a minute before slicing (melty cheese burns are no joke). Serve with extra warm marinara for dipping, and prepare for compliments!
Tips for the Best Baked Italian Grinder Sandwiches
After making these sandwiches more times than I can count (seriously, my family demands them weekly now), I’ve picked up some foolproof tricks for absolute perfection:
- Marinara moderation: Too much sauce = soggy bread disaster. I use just enough to flavor without drowning the ingredients – about 1 tablespoon per layer does the trick.
- Fresh basil is key: That last-minute sprinkle of bright green leaves cuts through the richness beautifully. If you must use dried, add it to the mayo mixture instead.
- Broiler vigilance: That tempting cheesy crust can burn in seconds! I stand guard with oven mitts ready, singing “99 Bottles of Beer” to time the perfect 90-second broil.
Oh, and pro tip: let them rest 2 minutes after baking – the cheese sets just enough to prevent nuclear-hot drips down your chin (learned that the hard way)!
Variations for Your Baked Italian Sub
The beauty of these sandwiches? You can make them your own with simple swaps! Here are my favorite twists when I’m feeling adventurous:
- Turkey twist: Swap the ham for smoky turkey breast – my kids prefer this version
- Spicy upgrade: Giardiniera instead of banana peppers brings serious heat (perfect with an ice-cold beer!)
- Cheese change-up: Mozzarella melts beautifully if you’re out of provolone
- Veggie delight: Add roasted red peppers or sautéed mushrooms for extra depth
The basic formula stays golden: crusty bread + melty cheese + your favorite flavors = sandwich heaven every time!
Serving and Storing Baked Italian Grinder Sandwiches
These sandwiches are absolute perfection when served piping hot right from the oven – that first bite of crispy bread with molten cheese is pure bliss! I always put out extra warmed marinara for dipping (because let’s be honest, everyone wants more of that saucy goodness). If you’ve got leftovers (unlikely, but it happens), wrap them tightly in foil and refrigerate. When ready to enjoy again, reheat in a 350°F oven for about 10 minutes – the foil keeps them from drying out while bringing back that fresh-baked magic. Microwaving works in a pinch, but nothing beats the oven for reviving that perfect crispy texture!
Baked Italian Grinder Sandwich FAQs
I get questions about these baked Italian subs all the time – here are answers to the ones that pop up most often from friends and family (and yes, some of these come from my own kitchen disasters!):
Can I assemble these ahead of time?
Absolutely! I often prep everything up to the baking step, wrap them tightly in foil, and refrigerate for up to 4 hours before baking. Just add 2-3 extra minutes to the baking time since they’re going in cold. Perfect for when company’s coming!
What’s the best bread substitute if I can’t find hoagie rolls?
No worries – I’ve used everything from French bread to ciabatta rolls in a pinch! Just look for something with a sturdy crust that won’t get soggy. My secret? Slice a baguette into 6-inch lengths and hollow out some of the soft interior to make room for all those delicious fillings.
How can I make these spicier?
Oh, I’ve got you covered! Besides adding more red pepper flakes, try using hot capicola instead of ham, or mix in some sliced jalapeños with the banana peppers. My husband’s favorite trick? A drizzle of spicy honey right before serving – sweet heat perfection!
Can I freeze baked grinder sandwiches?
You can, but fair warning – the texture won’t be quite the same. If you must, freeze before baking (wrap each one individually in foil), then bake straight from frozen, adding about 10 extra minutes. The cheese still gets melty, but the bread loses some of that perfect crispness.
Why does my sandwich get soggy?
Usually from too much sauce or not toasting the bread first – that quick pre-bake makes all the difference! Also, make sure to drain your banana peppers well. If all else fails, serve the extra marinara on the side for dipping instead of putting it inside the sandwich.
Nutritional Information
Now, let’s talk numbers – but remember, these are just estimates since your favorite brand of salami or type of bread can change things up. I always say food is meant to be enjoyed, but it’s good to know what you’re biting into! Here’s the breakdown per sandwich (based on my go-to ingredient choices):
- Calories: About 650 – hey, it’s a hearty meal!
- Protein: 32g (all that delicious meat and cheese adds up)
- Carbohydrates: 50g (mostly from that crusty bread we love)
- Fat: 35g (but let’s be real – that’s where half the flavor comes from)
- Sodium: Around 1500mg (typical for cured meats – maybe drink extra water)
A little nutrition pro tip from me? Pair your baked Italian grinder with a big green salad to balance things out – the vinegar in the dressing cuts through all that richness perfectly. But honestly? Some days you just need that melty, meaty comfort food, and that’s okay too!
Rate This Recipe
Alright, sandwich lovers – now it’s your turn! Did you make these baked Italian grinder sandwiches? I wanna hear all about your experience! Drop a comment below and tell me:
- Did your family go crazy for them like mine does?
- What delicious variations did you try?
- Any brilliant tips you discovered while making them?
And hey, if you snapped a photo of your cheesy, golden masterpiece (I know you did – who can resist?), tag me on social media! There’s nothing I love more than seeing your kitchen creations. These sandwiches have become such a staple in my house that I’m constantly tweaking the recipe – your feedback helps me make it even better for everyone!
P.S. If you’re feeling extra generous, a star rating helps other home cooks know this recipe is legit. Five stars? Four? Be honest – I can take it! (But seriously, make them first – that first bite of melty provolone will probably sway you toward five!)
PrintBaked Italian Grinder Sandwiches: 3 Secrets to Perfect Gooey Cheesy Bliss

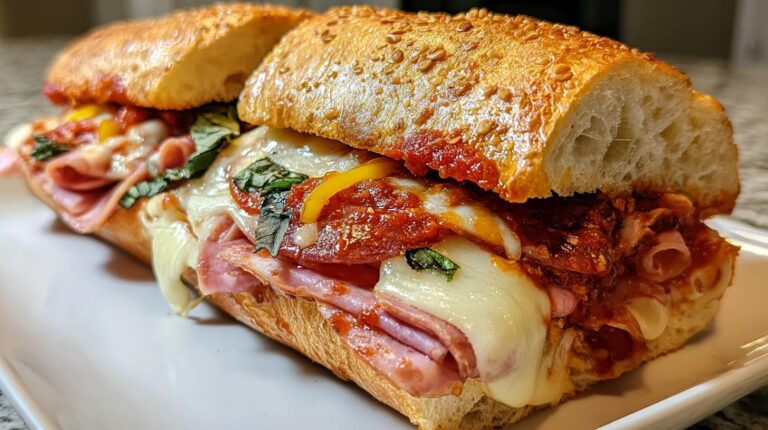
Baked Italian Grinder Sandwiches are a hearty and flavorful meal, perfect for lunch or dinner. Stuffed with layers of ham, salami, pepperoni, provolone, and banana peppers, then baked until the cheese is melted and bubbly.
- Prep Time: 10 minutes
- Cook Time: 12 minutes
- Total Time: 22 minutes
- Yield: 4 servings 1x
- Category: Sandwich
- Method: Baking
- Cuisine: Italian
- Diet: Halal
Ingredients
- 4 hoagie rolls or sub rolls
- 1 cup marinara sauce (plus more for dipping)
- 8 slices provolone cheese
- 6 oz deli ham, sliced
- 6 oz salami, sliced
- 3–4 oz pepperoni slices
- 1/2 cup banana pepper rings and/or dill pickle slices
- 1/2 cup fresh basil leaves (or shredded romaine)
- 3 tbsp mayonnaise
- 2 tbsp grated Parmesan
- 1 tbsp melted butter or olive oil
- 1 tsp garlic powder
- 1 tsp Italian seasoning
- Optional: crushed red pepper flakes, black pepper
Instructions
- Preheat oven to 375°F. Line a baking sheet with foil or parchment.
- Slice rolls lengthwise (don’t cut all the way through). Place on the baking sheet and lightly toast 3–4 minutes to crisp the inside.
- Stir together mayo + Parmesan + garlic powder + Italian seasoning. Spread inside each roll.
- Spoon a little marinara onto the bottom of each roll.
- Layer in this order: provolone → ham → salami → pepperoni → provolone. Add banana peppers/pickles and basil.
- Spoon a little more marinara over the top layer (don’t overdo it so the bread stays sturdy).
- Brush tops with melted butter/olive oil and sprinkle with a pinch more Italian seasoning (and red pepper flakes if you like).
- Bake 10–12 minutes until cheese is melted and sandwiches are hot. Broil 1–2 minutes for extra golden tops (watch closely).
- Slice and serve with extra warm marinara for dipping.
Notes
- Customize with your favorite deli meats and cheeses.
- Adjust spice level with more or fewer red pepper flakes.
- Use fresh marinara for the best flavor.
Nutrition
- Serving Size: 1 sandwich
- Calories: 650
- Sugar: 5g
- Sodium: 1500mg
- Fat: 35g
- Saturated Fat: 12g
- Unsaturated Fat: 18g
- Trans Fat: 0g
- Carbohydrates: 50g
- Fiber: 3g
- Protein: 32g
- Cholesterol: 80mg
Keywords: hot Italian sub, baked Italian subs, grinder sandwich recipe, baked sub sandwiches, Italian deli sandwich