
Oh, the cheesy patty melt – my ultimate comfort food crush! There’s something magical about that crispy, buttery bread hugging a juicy beef patty and oozing melted cheese. I fell in love with this diner-style sandwich years ago during late-night study sessions, and now it’s my go-to when I need something quick yet ridiculously satisfying.
What makes this version special? It’s all about keeping things simple but perfect. After countless skillet experiments (and maybe a few cheese-stained shirts), I’ve nailed the balance of textures and flavors. The secret? Good bread, properly seasoned beef, and letting that cheese get gloriously melty. Trust me, once you taste that first gooey bite, you’ll understand why this sandwich deserves a permanent spot in your weeknight rotation.
Why You’ll Love This Cheesy Patty Melt
This isn’t just another sandwich – it’s a total game-changer. Here’s why:
- Melty cheese perfection: That glorious cheese pull you dream about? We’re making it happen with two layers of gooey goodness.
- Juicy beef that actually tastes like beef: Proper seasoning makes these thin patties sing with flavor.
- Diner magic at home: All that crispy, buttery bread nostalgia without leaving your kitchen.
- Faster than takeout: From skillet to plate in under 30 minutes – perfect for hangry emergencies.
- Customizable: Use my sauce or skip it, swap cheeses – make it your own!
Seriously, this sandwich checks all the boxes – crispy, melty, juicy, and oh-so-satisfying. Your taste buds will thank you.
Ingredients for the Perfect Cheesy Patty Melt
Gather these simple ingredients – quality matters here, folks! This isn’t the time to skimp:
- 1 lb ground beef (80/20 preferred) – That 20% fat keeps our patties juicy
- 1 tsp kosher salt – My secret for perfect seasoning
- 1/2 tsp black pepper – Freshly ground if you’ve got it
- 1/2 tsp garlic powder – The flavor booster
- 4 slices sandwich bread – Texas toast or sourdough are my go-tos
- 2 tbsp butter, softened – For that golden, crispy exterior
- 4 slices cheese – American melts like a dream, but cheddar works too
Optional sauce lovers: mayo, ketchup, mustard, relish, paprika, and pepper – trust me, it’s worth the extra 2 minutes!
How to Make a Cheesy Patty Melt
Alright, let’s get down to business! Making the perfect patty melt is easier than you think – I’ll walk you through each step with all my tested tips. The key is moving quickly and not overcomplicating things. You’ll be biting into cheesy glory before you know it!
Step 1: Prepare the Sauce (Optional)
First things first – let’s whip up that special sauce (if you’re into it). I call this my “diner-style magic” – just grab a small bowl and stir together:
- 1/4 cup mayo
- 2 tbsp ketchup
- 1 tbsp yellow mustard
- 1 tbsp pickle relish (the sweet kind works great)
- 1/2 tsp paprika (skip if you don’t have it – no big deal!)
- A good pinch of black pepper
Mix it until smooth and set it aside. This stuff keeps well in the fridge too – I often make extra for burgers later in the week!
Step 2: Shape and Season the Patties
Now for the beef – this part’s crucial! Divide your ground beef into two equal portions (about 8oz each). Here’s my pro tip: shape them wider than your bread slices and about 1/4 inch thick – they’ll shrink up while cooking.
Sprinkle both sides generously with:
- Kosher salt (about 1/2 tsp per patty)
- Black pepper (1/4 tsp per side)
- Garlic powder (a light dusting does wonders)
Press the seasoning in gently – we want flavor in every bite without overworking the meat. These thin patties cook fast, so have your skillet ready!
Step 3: Cook the Beef Patties
Heat a heavy skillet (cast iron is perfect) over medium-high heat – you want it nice and hot. No oil needed – that beef fat will do its thing!
Cook the patties for 3-4 minutes per side – resist the urge to press them down! We’re going for a good sear with juicy centers. When you see those beautiful browned edges and juices rising to the top, flip them.
Once cooked through (no pink remaining), transfer to a plate. Important: don’t wipe the skillet yet – those browned bits add amazing flavor to our sandwich!
Step 4: Assemble and Toast the Sandwich
The grand finale! Butter one side of each bread slice – this is what gives that perfect golden crunch. On the unbuttered sides:
- Spread a thin layer of sauce (if using)
- Add a slice of cheese
- Place the warm patty
- Top with another cheese slice
- Cap it with the second bread slice (buttered side out)
Return the skillet to medium heat. Carefully place your assembled sandwiches in – you should hear a gentle sizzle. Cook for 3-4 minutes per side, pressing lightly with a spatula to help the cheese melt evenly.
When both sides are golden brown and the cheese is oozing (you’ll know!), remove from heat. Let it rest for just a minute before slicing – trust me, this prevents cheese avalanches!
Tips for the Best Cheesy Patty Melt
After making approximately a million of these sandwiches (okay, maybe just dozens), I’ve learned all the tricks for patty melt perfection:
- Cast iron is your friend: That even heat distribution gives you the perfect golden crust without burning.
- Cheese matters: American melts like a dream, but try sharp cheddar for extra flavor – just know it won’t get quite as oozy.
- Serve immediately: This sandwich waits for no one! That crisp bread and melty cheese are best enjoyed piping hot.
- Press gently: A light spatula press while toasting helps everything meld together without squishing the bread flat.
- Slice diagonally: Not just for looks – it gives you the perfect cheese-to-bite ratio!
Follow these simple tips, and you’ll be making diner-worthy patty melts every time!
Ingredient Substitutions and Variations
Don’t stress if you’re missing something – this sandwich is crazy adaptable! Here are my favorite swaps:
- Beef alternatives: Ground turkey or chicken work, just add a bit more seasoning. For vegetarians, a thick portobello mushroom makes a great stand-in!
- Bread options: Gluten-free? Use your favorite sturdy GF bread. Rye adds great flavor if you’ve got it.
- Cheese experiments: Spice lovers – try pepper jack! Swiss gives a nice tang, or mix cheeses for fun.
- Sauce shortcuts: Out of ingredients? Thousand Island dressing works in a pinch.
The beauty? You really can’t mess this up – make it YOUR perfect melt!
Serving Suggestions for Your Cheesy Patty Melt
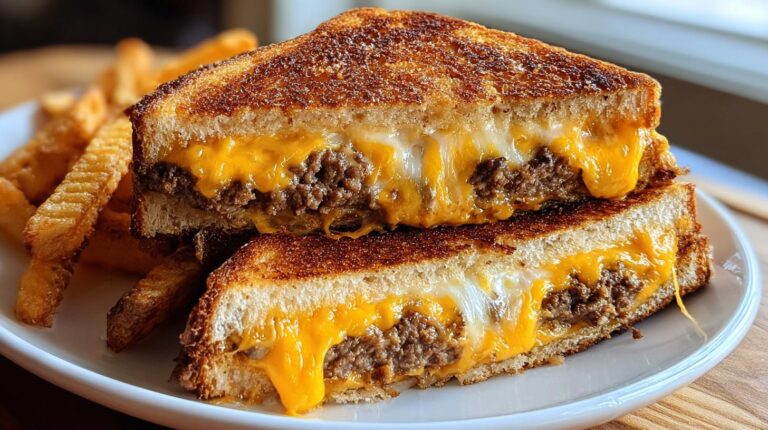
Oh, we’re not stopping at just the sandwich – let’s build the full diner experience right at your table! My favorite move? Pile those golden fries right next to your patty melt, with a handful of crisp dill pickles on the side. The vinegar snap cuts through all that cheesy richness perfectly.
For something lighter, a simple side salad works wonders – just greens with a tangy vinaigrette. And presentation matters! Serve it open on the plate with those melty cheese strands showing – that’s how the old-school diners do it. Don’t forget the napkins… this is gloriously messy eating at its best!
Storing and Reheating Leftovers
Okay, let’s be real – these patty melts are best fresh, but life happens! If you’ve got leftovers (impressive self-control!), wrap them tightly in foil and refrigerate for up to 2 days. When reheating, skip the microwave – that’ll make your bread soggy. Instead, pop it back in a skillet over medium-low heat for a few minutes per side. The cheese will get melty again and the bread regains some crispiness. Not quite as magical as fresh, but still pretty darn good when that craving hits!
Cheesy Patty Melt FAQs
I’ve answered tons of patty melt questions over the years – here are the ones I get most often:
Can I use pre-sliced cheese?
Absolutely! While I love slicing my own from a block (it melts slightly better), pre-sliced works great in a pinch. Just make sure it’s real cheese – no “cheese product” if you want that perfect ooze.
How do I prevent soggy bread?
Two tricks: First, toast one side of your bread lightly before assembling (just 1 minute in the skillet). Second, spread your sauce right before cooking – letting it sit on the bread too long causes sogginess.
What’s the best cheese for melting?
American cheese melts like a dream, but I often mix it with sharp cheddar for extra flavor. Pro tip: grated cheese melts faster than slices if you’re in a hurry!
Can I make these ahead?
You can prep the patties and sauce ahead, but assemble and cook right before serving. Nobody wants a sad, pre-made patty melt!
Why Texas toast?
That thick bread holds up to all the juicy goodness without falling apart. Regular sandwich bread works too – just double up the slices if they seem thin.
Nutritional Information
Just a heads up – nutrition can vary based on your exact ingredients, but here’s the general breakdown per serving (that’s one glorious sandwich!): about 850 calories, 50g fat (20g saturated), 38g protein. Not exactly diet food, but worth every single melty bite if you ask me!
Share Your Cheesy Patty Melt Experience
I’d love to hear about your patty melt adventures! Did you stick with classic American cheese or try something wild? Tag me in your melty sandwich photos – nothing makes me happier than seeing your cheesy creations!
PrintIrresistible Cheesy Patty Melt Recipe in Just 30 Minutes

A delicious and easy-to-make cheesy patty melt sandwich with gooey melted cheese and juicy beef patties.
- Prep Time: 10 minutes
- Cook Time: 20 minutes
- Total Time: 30 minutes
- Yield: 2 servings 1x
- Category: Sandwich
- Method: Stovetop
- Cuisine: American
- Diet: Low Lactose
Ingredients
- 1 lb ground beef (80/20 preferred)
- 1 tsp kosher salt
- 1/2 tsp black pepper
- 1/2 tsp garlic powder
- 4 slices sandwich bread (Texas toast or sourdough works great)
- 2 tbsp butter, softened (for toasting)
- 4 slices cheese (American, cheddar, or a mix)
- Optional sauce:
- 1/4 cup mayo
- 2 tbsp ketchup
- 1 tbsp yellow mustard
- 1 tbsp pickle relish
- 1/2 tsp paprika (optional)
- Pinch of black pepper
Instructions
- Make the sauce (optional): Stir mayo, ketchup, mustard, relish, paprika, and pepper in a small bowl. Set aside.
- Form and season patties: Divide ground beef into 2 thin, wide patties shaped to match your bread. Season both sides with salt, pepper, and garlic powder.
- Cook the patties: Heat a skillet over medium-high heat. Cook patties 3–4 minutes per side until browned and cooked through. Transfer to a plate.
- Assemble: Spread a thin layer of sauce on the inside of each bread slice (optional). Add a slice of cheese, the beef patty, then another slice of cheese. Top with remaining bread.
- Toast to melty perfection: Butter the outside of each sandwich. Wipe skillet if needed, then toast sandwiches over medium heat 3–4 minutes per side, pressing lightly, until deeply golden and the cheese is fully melted.
- Serve: Slice in half and serve hot (fries optional but highly encouraged).
Notes
- Use a cast-iron skillet for the best results.
- Adjust seasoning to taste.
- Serve immediately for the best texture.
Nutrition
- Serving Size: 1 sandwich
- Calories: 850
- Sugar: 5g
- Sodium: 1200mg
- Fat: 50g
- Saturated Fat: 20g
- Unsaturated Fat: 25g
- Trans Fat: 1g
- Carbohydrates: 45g
- Fiber: 2g
- Protein: 38g
- Cholesterol: 150mg
Keywords: cheesy patty melt, patty melt recipe, grilled cheese burger, diner style sandwich, melty cheese sandwich, easy skillet dinner