
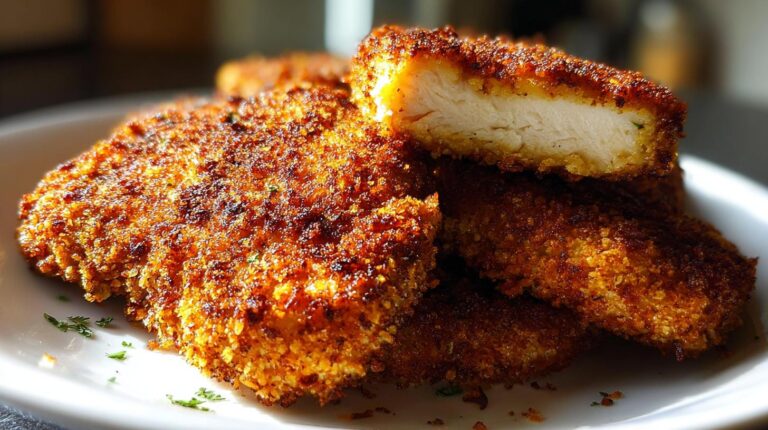
There’s something magical about that first bite of perfectly crispy breaded chicken cutlets – the golden crunch giving way to juicy, tender chicken inside. This is my go-to weeknight lifesaver when I need something delicious FAST (we’re talking 25 minutes start to finish). My secret? A triple-coated breading with a sneaky Parmesan addition that makes these cutlets extra irresistible. I’ve been making this version for years – since my college days when I needed budget-friendly meals that didn’t taste like compromises. These cutlets work equally well piled high on sandwiches, sliced over salads, or served with lemon wedges for squeezing. The best part? That satisfying CRUNCH holds up even when reheated tomorrow for lunch.
Why You’ll Love These Crispy Breaded Chicken Cutlets
Trust me, once you try these golden beauties, you’ll wonder how you ever survived without them in your recipe rotation. Here’s why they’re my forever favorite:
- Weeknight superhero: From fridge to plate in 25 minutes flat—even faster than waiting for pizza delivery!
- Crunch that lasts: That perfect crackle stays crispy even when reheated (unlike those sad, soggy cutlets from diners).
- Endlessly adaptable: Serve them fancy with a lemony arugula salad or casual as a sandwich—they never disappoint.
- Pantry-friendly ingredients: No fancy grocery runs needed. My secret Parmesan addition? Totally optional but oh-so-worth it.
Seriously, these cutlets have saved me from more “What’s for dinner?” meltdowns than I can count. The first time you hear that satisfying crunch, you’ll get it.
Ingredients for Crispy Breaded Chicken Cutlets
Here’s everything you’ll need to create that perfect golden crunch – I’ve listed exact amounts because eyeballing never works with breading (learned that the hard way after a flour disaster in my first apartment!). Pro tip: measure everything before starting – things move fast once the chicken hits the pan.
- 2 large boneless, skinless chicken breasts (butterflied and cut into 4 cutlets – trust me, thinner is better for maximum crispiness)
- 1 tsp kosher salt (don’t skimp – this seasons every bite)
- 1/2 tsp black pepper (freshly cracked if you’ve got it)
- 1 tsp paprika (my secret weapon! smoked gives depth, sweet works too)
- 1/2 tsp garlic powder (the good stuff, none of that old clumpy powder)
- 1/2 tsp onion powder (adds that umami magic)
- 1/2 tsp dried oregano (or Italian seasoning – whatever’s in your spice rack)
- 1/4 tsp cayenne pepper (optional but adds a nice little kick)
- 1/2 cup all-purpose flour (the glue that holds everything together)
- 2 large eggs (beaten with a fork until uniform)
- 1 tbsp milk (optional but makes the egg wash smoother)
- 1 cup seasoned breadcrumbs (or panko for extra crunch – my personal favorite)
- 1/4 cup grated Parmesan (optional but HIGHLY recommended – takes it to another level)
- 3-4 tbsp oil for frying (vegetable, canola, or avocado oil – something with a high smoke point)
- Chopped parsley (optional garnish – makes it pretty for guests!)
See that Parmesan in the optional ingredients? Don’t let that fool you – it’s what separates good cutlets from “holy-cow-I-need-this-every-week” cutlets. And if you’re out of milk for the egg wash? No sweat – water works in a pinch too!
How to Make Crispy Breaded Chicken Cutlets
Okay, let’s get down to business! I’ve made these cutlets so many times I could probably do it in my sleep (though I don’t recommend trying that – hot oil and sleepiness don’t mix). Follow these steps and you’ll have golden, crispy perfection every single time. I’ll walk you through each step like I’m right there in the kitchen with you!
Step 1: Prep the Chicken
First things first – the chicken. Place your breasts on a cutting board and slice them horizontally to butterfly (don’t worry if they’re not perfect – mine never are). Then cut all the way through to make 4 thin cutlets. Now here’s my secret trick: pat them DRY with paper towels. Like, really dry. Any moisture is the enemy of crispy breading. I learned this the hard way after many sad, breading-less cutlets.
Next, season both sides generously with all those beautiful spices – the salt, pepper, paprika, garlic powder, onion powder, oregano, and cayenne if you’re feeling spicy. Rub it in gently with your fingers – this isn’t just sprinkling, it’s about making sure every bite sings with flavor. Let them hang out for 5 minutes while you set up your breading station.
Step 2: Set Up Breading Stations
Time to create your assembly line! You’ll need three shallow bowls (I use pie plates because they’re perfect for this) and one clean hand for dry ingredients, one for wet (trust me, this keeps mess to a minimum).
In Bowl 1: The flour – just plain all-purpose. Bowl 2: Whisk those eggs with the milk (if using) until completely uniform. Bowl 3: Your breadcrumbs mixed with that glorious Parmesan. Line them up in order – flour, eggs, breadcrumbs – with a clean plate at the end for your breaded cutlets.
Now for the fun part! One cutlet at a time: dredge in flour (shake off excess), dip in egg (let the excess drip off), then press FIRMLY into the breadcrumbs. I mean really press – this ensures maximum crispiness. Flip and repeat, then place on your clean plate. Repeat with all cutlets – don’t crowd them!
Step 3: Fry to Perfection
Heat your oil in a large skillet over medium-high heat. You’ll know it’s ready when a breadcrumb sizzles immediately upon contact. Carefully add your cutlets (don’t crowd the pan – cook in batches if needed). Now here’s where patience pays off: don’t touch them for a full 3 minutes! This lets that beautiful crust form.
After 3-4 minutes, peek underneath – golden brown? Perfect! Flip carefully with tongs and cook another 3 minutes on the other side. They’re done when they reach 165°F internally (if you don’t have a thermometer, the juices should run clear). Transfer to a paper towel-lined plate to drain – this keeps them crispy!
Pro tip: If cooking in batches, keep the first batch warm in a 200°F oven while you cook the rest. And resist cutting into them right away – letting them rest 2 minutes keeps all those juices inside where they belong!
Tips for the Crispiest Breaded Chicken Cutlets
After years of trial and error (and more than a few soggy cutlet disasters), I’ve nailed down the secrets to that perfect, shatteringly crisp crust every time. Here are my can’t-live-without tips:
- Panko power: Swap regular breadcrumbs for panko – those flaky Japanese-style crumbs create an extra crunchy texture that stays crisp for hours.
- Press it real good: When breading, really press those crumbs into the chicken – I use the palm of my hand to ensure maximum adhesion.
- Dry before you fry: Let breaded cutlets rest 5 minutes before cooking – this helps the coating set so it won’t fall off in the pan.
- Oil temperature is key: Too cool and they’ll soak up oil, too hot and they’ll burn. Test with a breadcrumb – it should sizzle immediately.
- Don’t crowd the pan: Give each cutlet space to breathe – overcrowding steams them instead of crisping.
Follow these simple tricks, and you’ll never suffer through a limp cutlet again!
Serving Suggestions for Crispy Breaded Chicken Cutlets
Here’s where the real fun begins – these golden beauties are like the little black dress of weeknight dinners! They play well with absolutely everything. I’ve served them a hundred different ways over the years, but these are my all-time favorite pairings:
- The Classic Sandwich: Pile them high on a toasted bun with mayo, crisp lettuce, and a squeeze of lemon. Add pickles if you’re feeling fancy!
- Over Greens: Slice them warm over an arugula salad with shaved Parmesan and balsamic glaze – my go-to “fancy but easy” dinner party trick.
- Pasta’s Best Friend: Toss them with spaghetti and marinara (or my personal fave – lemon garlic butter sauce) for a comfort food dream.
- Next to Veggies: Simple roasted broccoli or green beans make the perfect crunchy side – bonus points if you finish with lemon zest.
- With Dipping Sauces: Honey mustard, ranch, or spicy mayo take these from dinner to party food in seconds.
Last week I even crumbled leftovers onto a pizza (don’t judge – it was AMAZING). The possibilities are endless – that’s why this recipe stays in heavy rotation at my house!
Storing and Reheating Crispy Breaded Chicken Cutlets
Okay, confession time – I almost never have leftovers because we gobble these up! But when I do manage to save some (usually by hiding them in the back of the fridge), here’s how I bring back that amazing crunch: First, let them cool completely before storing in an airtight container – they’ll keep for 3 days in the fridge. To reheat, skip the microwave (soggy city!) and use either a 375°F oven for 10-12 minutes or an air fryer at 350°F for 4-5 minutes. The breading stays miraculously crisp – almost like fresh! Pro tip: If they seem dry, spritz lightly with oil before reheating.
Crispy Breaded Chicken Cutlets Variations
One of my favorite things about this recipe is how easily you can mix it up! Over the years, I’ve played with dozens of variations – some born from pantry shortages, others from pure curiosity. Here are my absolute favorite twists that still deliver that signature crunch:
- Lemon Lover’s Version: Add 1 tbsp lemon zest to the breadcrumbs and serve with extra lemon wedges. The bright citrus cuts through the richness perfectly – my husband’s favorite!
- Herb Explosion: Mix 2 tbsp each fresh chopped parsley, basil, and thyme into the breadcrumbs. Smells like summer in every bite.
- Spicy Kick: Double the cayenne and add 1 tsp chili powder to the flour mixture. Serve with cool ranch dressing to balance the heat.
- Gluten-Free Magic: Swap flour for almond flour and use gluten-free panko. Works like a charm – my gluten-sensitive sister swears by this version.
- Parmesan Upgrade: Increase Parmesan to 1/2 cup and add 1 tsp garlic powder to the breadcrumbs. So cheesy, so good!
- Everything Bagel Style: Replace half the breadcrumbs with crushed everything bagel seasoning. Breakfast-for-dinner vibes!
The best part? You can mix and match these ideas! Last week I did lemon-herb cutlets that were downright addictive. Don’t be afraid to experiment – that’s how all the best recipes are born. Just promise me you’ll always keep that golden crunch – it’s what makes these cutlets truly special!
Nutritional Information
Okay, let’s talk numbers – because let’s be real, we all want to know what we’re biting into! Here’s the nutritional breakdown per serving (that’s one glorious cutlet). Just remember: these are estimates based on the exact ingredients I use, and your numbers might vary slightly depending on brands or tweaks you make to the recipe.
- Serving Size: 1 cutlet
- Calories: 410
- Total Fat: 18g (3g saturated, 12g unsaturated)
- Cholesterol: 180mg
- Sodium: 650mg
- Total Carbohydrates: 25g
- Fiber: 1g
- Sugar: 1g
- Protein: 38g
A few quick notes from my kitchen to yours: Using panko instead of regular breadcrumbs might add a few extra calories but gives you that amazing crunch. If you skip the Parmesan (though why would you?), you’ll save about 30 calories per serving. And remember – the oil amount is an estimate based on how much the chicken actually absorbs (I blot mine well to keep it on the lower end).
Most importantly? These cutlets pack a serious protein punch that’ll keep you full for hours! I always pair mine with a big salad or roasted veggies to round out the meal perfectly.
FAQs About Crispy Breaded Chicken Cutlets
Over the years, I’ve gotten so many questions about these golden beauties – here are the ones that pop up most often in my kitchen (and my honest answers after countless batches):
Q1: Can I bake these instead of frying for a healthier option?
Absolutely! Place breaded cutlets on a wire rack over a baking sheet (this lets air circulate) and bake at 400°F for 18-20 minutes. Spritz lightly with oil first for extra crispness. They won’t be quite as crunchy as fried, but still delicious! My trick? Give them a quick broil at the end for that golden color.
Q2: Help! My breading keeps falling off – what am I doing wrong?
Oh honey, I’ve been there! Three common culprits: 1) Not patting chicken dry enough before breading (moisture is the enemy!), 2) Not pressing crumbs firmly enough (really get in there with your palm), or 3) Flipping too soon in the pan – wait until that crust sets (about 3 minutes). Also – make sure your oil is hot enough before adding chicken!
Q3: Can I make these ahead of time?
You sure can! Bread the cutlets up to 4 hours ahead and refrigerate (place parchment between layers). For longer storage, freeze breaded raw cutlets on a tray, then transfer to bags for up to 3 months – cook straight from frozen (just add a few extra minutes). Game changer for busy nights!
Q4: What’s the best oil for frying cutlets?
I swear by avocado oil for its high smoke point and neutral flavor, but vegetable or canola oil work great too. Olive oil burns too easily – save that for finishing! Pro tip: Maintain about 1/4 inch oil depth in your pan and replenish between batches if needed.
Q5: How thin should I pound the chicken?
About 1/4 to 1/2 inch thick is perfect – thin enough to cook quickly but thick enough to stay juicy. No meat mallet? Use a rolling pin or even the bottom of a heavy skillet (wrap chicken in plastic first). I’ve also sliced breasts horizontally – whatever gets you even thickness!
**3 Secrets to Perfect Crispy Breaded Chicken Cutlets – Guaranteed!**

Crispy breaded chicken cutlets are a quick and easy weeknight meal. These golden cutlets are seasoned well and cooked to perfection for a satisfying crunch.
- Prep Time: 10 minutes
- Cook Time: 15 minutes
- Total Time: 25 minutes
- Yield: 4 servings 1x
- Category: Main Course
- Method: Pan-Frying
- Cuisine: American
- Diet: Low Lactose
Ingredients
- 2 large boneless, skinless chicken breasts (butterflied and cut into 4 cutlets)
- 1 tsp kosher salt
- 1/2 tsp black pepper
- 1 tsp paprika (smoked or sweet)
- 1/2 tsp garlic powder
- 1/2 tsp onion powder
- 1/2 tsp dried oregano (or Italian seasoning)
- 1/4 tsp cayenne pepper (optional, for heat)
- 1/2 cup all-purpose flour
- 2 large eggs
- 1 tbsp milk (optional, helps the egg wash)
- 1 cup seasoned breadcrumbs (or panko for extra crunch)
- 1/4 cup grated Parmesan (optional but amazing)
- 3–4 tbsp oil for frying (vegetable, canola, or avocado oil)
- Chopped parsley (optional garnish)
Instructions
- Pat chicken cutlets dry. Season both sides with salt, pepper, paprika, garlic powder, onion powder, oregano, and cayenne (if using).
- Place flour in one shallow bowl. Whisk eggs (and milk) in a second bowl. In a third bowl, mix breadcrumbs and Parmesan (if using).
- Dredge each cutlet in flour, dip in egg, then press firmly into breadcrumb mixture to fully coat.
- Heat oil in a large skillet over medium-high heat. Fry cutlets 3–4 minutes per side until deep golden brown and cooked through (165°F internal). Add oil as needed between batches.
- Transfer to a plate lined with paper towels. Rest 2 minutes, garnish with parsley, and serve hot.
Notes
- Use panko breadcrumbs for extra crunch.
- Check internal temperature with a meat thermometer for doneness.
- Let the cutlets rest before serving to retain juiciness.
Nutrition
- Serving Size: 1 cutlet
- Calories: 410
- Sugar: 1g
- Sodium: 650mg
- Fat: 18g
- Saturated Fat: 3g
- Unsaturated Fat: 12g
- Trans Fat: 0g
- Carbohydrates: 25g
- Fiber: 1g
- Protein: 38g
- Cholesterol: 180mg
Keywords: breaded chicken cutlets recipe, crispy chicken cutlets, easy chicken cutlets, crunchy chicken breast cutlets, quick weeknight chicken