
Nothing beats the sound of crispy breaded chicken cutlets sizzling in the pan when you’re racing against the clock to get dinner on the table. That golden-brown crunch? Pure magic. What I love most is how these beauties transform basic chicken breasts into something spectacular with just a simple breading technique – my grandma’s foolproof method that never fails.
Every Thursday growing up was “cutlet night” in our house. My mom would pound the chicken thin while I set up the breading station, flour dust flying everywhere. We’d fight over who got the first perfectly crisp piece straight from the skillet. Now I make them for my own family, and that same glorious crunch still makes everyone come running to the kitchen.
What makes these crispy breaded chicken cutlets so perfect for weeknights? They’re ready in 30 minutes flat, work with any side you’ve got, and that satisfying texture – crisp outside, juicy inside – makes even picky eaters clean their plates. Trust me, once you master this technique, it’ll become your go-to dinner just like it’s been mine for years.
Why You’ll Love These Crispy Breaded Chicken Cutlets
Oh, where do I even start? These cutlets are absolute weeknight heroes, and here’s why:
- Quick magic: Ready in 30 minutes—faster than takeout, but so much tastier.
- That crunch: Golden, crispy outside with a juicy center (every. single. time).
- Kid-approved: Even my picky nephew devours these—no negotiating required.
- Versatile: Pair with lemony greens, pasta, or just eat straight off the cutting board (no judgment).
- Leftover love: They reheat like a dream for next-day sandwiches or salads.
Honestly, once you hear that first sizzle, you’ll be hooked.
Ingredients for Crispy Breaded Chicken Cutlets
Gather these simple ingredients – I bet you’ve got most in your pantry already! The magic happens when these humble components come together:
- The chicken: 2 large boneless, skinless breasts (butterflied and pounded to 1/4-inch thickness – trust me, thin is key!)
- Dry team: 1/2 cup all-purpose flour + 1 cup packed Italian-style breadcrumbs (or panko) + 1/4 cup grated Parmesan (optional but SO worth it)
- Seasoning squad: 1 tsp each garlic powder, onion powder, paprika + 1/2 tsp dried oregano + 1 tsp kosher salt + 1/2 tsp black pepper
- Wet ingredients: 2 large eggs + 1 tbsp water (that’s your glue!)
- For frying: 1/3 cup vegetable oil (more if needed) + lemon wedges + chopped parsley for serving
Ingredient Substitutions
Out of something? Here’s how to adapt:
- Breadcrumbs: Panko works great for extra crunch, or crush crackers in a pinch
- Flour: Gluten-free 1:1 blend works beautifully
- Oil: Canola or avocado oil are perfect substitutes
- Eggs: Sorry folks, no swaps here – they’re essential for that perfect crust!
Psst… for air fryer fans: spray breaded cutlets with oil and cook at 400°F for 10-12 minutes, flipping halfway.
How to Make Crispy Breaded Chicken Cutlets
Alright, let’s get to the fun part – transforming those chicken breasts into golden, crispy perfection! I’ll walk you through each step like I’m right there in your kitchen. The secret? That three-step breading process and keeping your oil at just the right temperature. Ready? Let’s go!
Step 1: Prepare the Chicken
First, butterfly those breasts like you’re opening a book – slice horizontally almost all the way through, then unfold. Now the pounding! Place between plastic wrap or in a zip-top bag and whack with a meat mallet (or rolling pin in a pinch) until evenly 1/4-inch thick. Warning: Uneven thickness means some parts will overcook while others stay raw – we don’t want that!
Step 2: Set Up Your Breading Station
This is where the magic happens! Line up three shallow bowls: 1) Flour with all those glorious seasonings (give it a good whisk to distribute evenly), 2) Beaten eggs with water (this is your “glue”), and 3) Breadcrumbs mixed with Parmesan. Pro tip: Keep one hand for dry ingredients and one for wet to avoid “club fingers” (you’ll thank me later).
Step 3: Fry to Golden Perfection
Heat oil in a large skillet over medium-high until shimmering (about 350°F if you have a thermometer). Test with a breadcrumb – it should sizzle immediately. Working in batches (don’t crowd the pan!), fry cutlets 3-4 minutes per side until that gorgeous deep golden brown forms. Listen for that satisfying sizzle! Transfer to a paper towel-lined plate or wire rack. Must-do: Check internal temp reaches 165°F. And please – let them rest a minute before slicing so all those juices stay put!
See that gorgeous color? That’s the sound of dinner applause waiting to happen. Now all that’s left is squeezing fresh lemon over the top and digging in!
Tips for the Crispiest Breaded Chicken Cutlets
Want that perfect crunch every single time? Here are my tried-and-true secrets:
- Double dip: After the first breading, dip in egg again and coat with a second layer of crumbs for extra texture.
- Rest before frying: Let breaded cutlets sit 5 minutes – it helps the coating stick better.
- Drain smart: Use a wire rack instead of paper towels so bottoms stay crisp.
- Hot oil is happy oil: If the oil stops sizzling actively between batches, let it reheat before adding more chicken.
Follow these, and you’ll hear that satisfying crunch with every bite!
Serving Suggestions for Crispy Breaded Chicken Cutlets
Now for the best part – eating! My family goes wild when I serve these golden beauties with:
- A big lemon wedge squeezed over the top (that bright acidity cuts through the richness perfectly)
- A simple arugula salad with shaved Parmesan and a lemony vinaigrette
- Garlicky roasted potatoes or buttery mashed potatoes (comfort food heaven!)
- For something fun, try them sandwich-style on crusty bread with spicy mayo
Honestly? They’re amazing straight off the cutting board before you even get plates out – not that I’d know anything about that…
Storing and Reheating
Leftovers? No problem! These cutlets keep beautifully in the fridge for up to 3 days – just store them in an airtight container. When you’re ready for round two, skip the microwave (unless you like soggy breading – yuck!). Instead, pop them in a 375°F oven or air fryer for 5-7 minutes to bring back that glorious crunch. Want to freeze? Layer between parchment paper in a freezer bag for up to 2 months. Thaw in the fridge overnight before reheating.
FAQs About Crispy Breaded Chicken Cutlets
Can I bake these instead of frying?
Absolutely! For oven-baked crispy breaded chicken cutlets, place them on a wire rack over a baking sheet (this helps air circulate). Bake at 400°F for about 20 minutes, flipping halfway through. They won’t get quite as golden as fried, but a quick broil at the end helps!
How thin should I pound the chicken?
I can’t stress this enough – aim for a consistent 1/4-inch thickness. Any thicker and the coating might burn before the chicken cooks through. Pro tip: Use the smooth side of your meat mallet and work from the center outward for even thickness.
What’s the best oil for frying?
My go-tos are vegetable or avocado oil – they have high smoke points and neutral flavors. Olive oil works in a pinch, but stick to regular (not extra virgin) to avoid burning. The oil should be about 1/4-inch deep in your pan and shimmering hot (around 350°F) before adding the chicken.
Can I prep these ahead?
You sure can! Bread the cutlets and refrigerate them uncovered for up to 2 hours before frying – this actually helps the coating stick better. Just don’t stack them or the breading will get soggy.
Nutritional Information
Remember, these are estimates – your exact values may vary slightly depending on ingredients and portion sizes:
- Serving size: 1 cutlet
- Calories: 520
- Protein: 42g
- Fat: 28g (5g saturated)
- Carbs: 28g (2g fiber, 2g sugar)
- Sodium: 890mg
Now that you’ve got all the details, try this recipe tonight and leave a comment telling me how your crispy breaded chicken cutlets turned out!
PrintIrresistible Crispy Breaded Chicken Cutlets in 30 Minutes

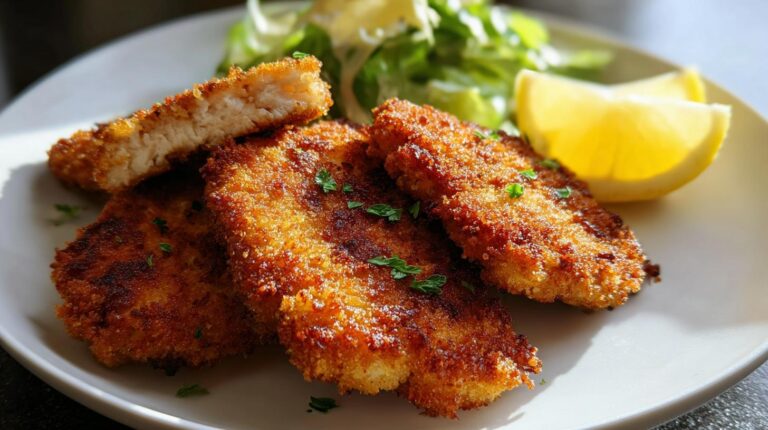
Crispy breaded chicken cutlets are an easy and delicious weeknight dinner. These golden-brown cutlets are perfectly seasoned and fried to perfection, served with lemon wedges and an optional side salad.
- Prep Time: 15 minutes
- Cook Time: 15 minutes
- Total Time: 30 minutes
- Yield: 4 servings 1x
- Category: Main Course
- Method: Pan-Frying
- Cuisine: Italian-American
- Diet: Low Lactose
Ingredients
- 2 large boneless skinless chicken breasts (butterflied and pounded thin)
- 1/2 cup all-purpose flour
- 2 large eggs
- 1 tbsp water (for egg wash)
- 1 cup Italian-style breadcrumbs (or panko)
- 1/4 cup grated Parmesan (optional but delicious)
- 1 tsp garlic powder
- 1 tsp onion powder
- 1 tsp paprika
- 1/2 tsp dried oregano (or Italian seasoning)
- 1 tsp kosher salt, divided
- 1/2 tsp black pepper
- 1/3 cup vegetable oil (for frying, more as needed)
- Lemon wedges (for serving)
- Chopped parsley (optional garnish)
Instructions
- Butterfly chicken breasts, then pound to about 1/4-inch thick. Season both sides with a pinch of salt and pepper.
- Set up breading station: Bowl 1 – flour + garlic powder + onion powder + paprika + oregano + 1/2 tsp salt + pepper. Bowl 2 – eggs + 1 tbsp water, whisked. Bowl 3 – breadcrumbs + Parmesan (if using) + remaining 1/2 tsp salt.
- Dredge chicken in flour, dip in egg, then coat well in breadcrumbs, pressing to adhere.
- Heat oil in a large skillet over medium-high heat. Fry cutlets 3–4 minutes per side until deep golden brown and cooked through (165°F). Work in batches; add more oil if needed.
- Transfer to a paper towel–lined plate. Slice and serve with lemon wedges.
Notes
- Use a meat mallet or rolling pin to pound chicken evenly.
- For extra crispiness, double-coat by repeating the egg and breadcrumb step.
- Adjust seasoning to taste.
Nutrition
- Serving Size: 1 cutlet
- Calories: 520
- Sugar: 2g
- Sodium: 890mg
- Fat: 28g
- Saturated Fat: 5g
- Unsaturated Fat: 18g
- Trans Fat: 0g
- Carbohydrates: 28g
- Fiber: 2g
- Protein: 42g
- Cholesterol: 190mg
Keywords: crispy breaded chicken cutlets, breaded chicken breast cutlets, crispy chicken schnitzel, easy chicken cutlet recipe, weeknight chicken dinner, lemon chicken cutlets